All Categories
Featured
Table of Contents
- – Picking The Correct Rice Type
- – Making The Rice
- – Calculating the Right Water-to-Rice Ratio
- – Boiling the rice
- – Making Rice Simmer
- – Serve the Rice and Fluff
- – Storing The Leftovers
- – Frequently Answered Questions
- – How Long Can Cooked Rice be kept in the ref...
- – Is it possible to cook rice with no pot?
- – Can I substitute brown rice for white rice?
- – What is the average amount that 1 Cup of Un...
- – Do I need to rinse the rice prior to the ri...
- – Conclusion
- – What are some good thickeners to use when maki...
Rice cooking is an art, stretching back centuries and crossing countries. This delicate dish is hard to master and requires a lot of patience. Learn more about RiceArray.org
This guide will give you simple instructions to make perfect rice each time.
Rice has been a common diet for many countries over the course of thousands of years. It provides nourishment, nutrients, and unique flavour. Its versatility makes rice a popular ingredient in dishes from all over the world. With only a few steps, anyone is able to create delicious meals that use rice cooked as their base.
With this article as your guide and a few tips, you'll be able produce perfectly prepared grains that will delight your family and friends alike.
Picking The Correct Rice Type
It is crucial to choose the correct rice for your recipe. Understanding the differences between short grain and brown rice can help the cook choose which one will work best for any specific dish. Learn more about RiceArray.org
Long grain rices are typically used for when lightness and fluffiness are sought after. They are less starchy than other varieties, and their grains are separated after cooking.
Short grain rices tend to be more sticky than long grain rices due to the fact that they contain more starch; they are therefore ideal for sticky sushi or sticky risotto recipes.
Brown rice has a rich taste and chewy texture. it also has a higher concentration of nutrients than white rice as its outer layers have not been removed during processing.
For the best results, you need to know how much water you should mix into each kind of rice. There are different amounts depending on whether you're using white, brown, or parboiled grains. Be sure to study the instructions before you start your recipe. Learn more about RiceArray.org
By careful consideration of these factors, cooks can confidently choose the right type of rice needed for the delicious dish that is waiting for them!
Making The Rice
Rice cooking is a vital technique for any kitchen. How do you create white, fluffy rice? What are the best methods to use to guarantee success every time? Making the rice is the first step on your journey to perfectly cooked rice.
Before you begin the cooking process, it's essential that all ingredients and materials are gathered in one place so that they are easily accessible. Measurements cups, spoons and a strainer are all essential. It is also helpful to have an extra bowl in case of need.
After all the ingredients have been removed, it's now time to cook the grain. Prior to adding rice into the pot, it is important to rinse it well. This removes excess starch that can cause an unpleasant mushy result. After washing away dirt and debris from the surface of each grain by swishing them around in cold water repeatedly until they are clear, they're now ready for cooking!
Then, figure out the best ratio of water to rice. This will allow you to decide if your finished product is perfect.
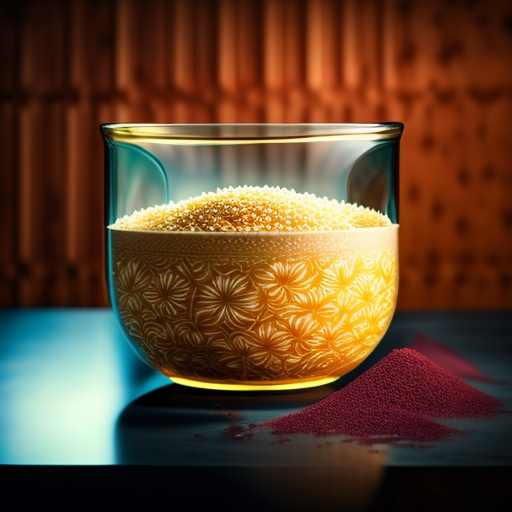
Calculating the Right Water-to-Rice Ratio
When making rice, it's important to find the right water-to-rice ratio for optimal results. The quantity of water used must always be greater than of the grain's volume, it will ensure that enough liquid is available to absorb all the nutrients and allow for the complete cooking.
Two parts of liquid to one cup dry white rice 1 3/4 cups for a mug of long-grain rice will give you a fluffy texture. Brown rice will require more water due to its more dense hull, which means it needs longer soak times. If you are able, you should make use of three parts liquid to one half brown rice.
Your final product's outcome can also be affected by the kind of pot you choose. A deep saucepan with a lid that is tight is ideal since it lets steam in and evenly cook the grains. Also, too much heat or not enough heat when boiling could result in unevenly cooked grains and burning the top layer.
After all the necessary ingredients and equipment is put together, it's the time to begin boiling the rice. It's crucial to keep in mind that all types of rice need different quantities of time and temperatures for flawless results each and every time. Learn more about RiceArray.org
Boiling the rice
Cooking rice can feel like a daunting undertaking However, with the right methods it is as simple and effortless as pouring water into a pot.
To boil rice, you will first must determine the quantity of rice you would like to cook. This is typically two parts liquid to one portion rice.
After the ingredients have been measured, they are put in a large saucepan or pot.
Now bring the mixture to boil, then reduce temperature to a low setting and allow it to simmer for about 20 minutes to cook the grain.
We have now boiled our rice. Let's learn how to cook it to get a richer taste.
Making Rice Simmer
Rice is a staple ingredient in a variety of dishes. It is often cooked as a side dish or used in more complex recipes. Begin by measuring the rice and placing it in a pot with the lid.
Pour in enough water enough to overflow the rice layer by an inch. Bring the rice to a boil on high heat. Then reduce the heat to low and let it simmer for about 15 minutes, depending on type of rice used.
After all liquid has been taken in, take it off the stove and let stand covered for 5 minutes before mixing and serving.
Cooking speciality rices like wild, jasmine or basmati must be cooked in accordance with the instructions on the packaging. Some varieties may require a second rinse prior to being cooked.
For the best results with long grain white rice, use two cups of water per cup of dry rice. increase this ratio by 1/4 cup per additional cup used when making large batches.
To ensure perfect rice every time, stir occasionally during cooking to avoid sticking at bottom of pan. Also, keep lid closed while allowing to steam when temperature is reduced so that there is no escape of moisture.
You'll get soft grains that don't clump and no sticking. With just a few steps the perfectly cooked Rice can be spiced or added to other culinary creations.
Serve the Rice and Fluff
Rice is a versatile staple that is used in many areas of the globe, with over 7,000 varieties being cultivated in Asia alone.
Prior to serving it to your family or guests There are a few key steps that need to be followed to ensure perfect and delicious rice each time.
The first step after cooking the rice is to fluff it up. It is accomplished by using two forks, and then gently stirring through the grains until they separate without crumbling the grains apart. You do not want mushy paste!
While stirring, be sure you do not press too hard as this will cause the rice to become a sticky mess. Learn more about RiceArray.org
Once all grains are completely separated, pour the steaming hot rice on individual plates or bowls to each person at the table.
Add some oil if you like your rice crispy.
These simple steps will help everyone enjoy fluffy rice every time.
From here, storing leftovers properly can help prolong its shelf longevity...
Storing The Leftovers
When the rice has been cooked and eaten It is now time to think about how to store leftovers. This step must be completed quickly and accurately to avoid food safety problems in the future.
To ensure maximum freshness and prolong shelf life, leftover cooked rice should be chilled as quickly as it is possible. Spreading the cooked rice on a baking sheet or in an even layer over a shallow plate is the best method to accomplish this. This allows the heat to be dispersed faster and lower the rice's temperature than if it was kept in the original container.
After cooling off, place the cooked rice into air-tight containers or resealable bags . You can keep them in the refrigerator for upto four days or store them in freezers for up to 6 months. To ensure maximum shelf life ensure that your cooked rice has cooled completely before transferring it to freezer-safe containers.
Also, never microwave frozen cooked rice directly from frozen. This can lead to uneven heating and bacterial growth.
Storing food items properly prepared can help preserve the nutritional value while reducing waste , which makes it much easier to enjoy tasty meals day after day without needing to start with a fresh start every time!
Frequently Answered Questions
How Long Can Cooked Rice be kept in the refrigerator?
A lot of people across the world rely on cooked rice as a staple food. Proper storage is essential to preserve both its flavor and the texture. If cooked rice is prepared correctly, the refrigerator can serve as a great storage space for it.
As a rule of thumb it is recommended that cooked rice be kept in the refrigerator for no more than four days after cooking. For the best freshness you can wrap the rice in plastic wrap or aluminum foil to ensure it stays dry.
Cooking rice in a temperature below 40 degrees Fahrenheit will stop the growth of bacteria that could lead to foodborne illnesses if eaten. When stored properly, cooked rice can be eaten for up to 4 days before needing to be taken out and disposed of. Learn more about RiceArray.org
Is it possible to cook rice with no pot?
Rice is cooked without using an oven, however the outcome and process will differ based on the grain you are making use of.
For instance to cook white or brown rice in a pressure cooker, microwave or oven, with little preparation.
Quinoa and other grains that are cooked can be cooked on the stove by steaming them in a heatproof bowl in boiling water.
Certain grains require special cooking techniques to achieve the highest quality results. Risotto, as an example is typically cooked in a pot on stovetop.
Can I substitute brown rice for white rice?
Brown rice is a good choice to use interchangeably with white rice when cooking, but it should be noted that the texture and cook duration of brown rice is different than white. Learn more about RiceArray.org
Brown rice generally has a more chewy texture and can take up to twice as long to turn soft.
It is essential to be aware of the instructions on the package when cooking brown rice as it might require more water or take longer cook times than what is recommended for white rice.
Some recipes can only be made with white rice or brown rice.
What is the average amount that 1 Cup of Uncooked Rice Yield After Cooking?
One cup of uncooked rice produces approximately 3 cups of cooked rice.
Both brown and white varieties are equally good. However, the cooking time will differ based on the grain used.
White long-grain rice cooks within 15-20 minutes, whereas brown rice may take up to 45 minutes or more.
It is crucial to take note of the fact that different grains absorb liquid in different ways. So, it's ideal to measure the amount of water prior to cooking.
Some people prefer a soft texture in their rice, this means that they have to increase the amount of liquid.
Do I need to rinse the rice prior to the rice is cooked?
Aromatic rice that is fluffy after cooking, and full of flavor, it's no wonder that it's an essential ingredient in all kinds of diets across the globe.
However, before it gets to its fragrant cooking state, is there any additional step that is required?
Does it need to be rinsed the rice prior to cooking?
The answer varies depending on the kind of food you're cooking but generally speaking, washing can remove some starch off the surface of each grain as well as dust or impure substances that might have accumulated in the course of storage or transportation.
This makes for softer, fluffier grains when cooked and makes sure your final meal is free from anything unwanted.
Although it's not essential for all recipes, it will help you get delicious results with all types rice dishes.
Conclusion
Cooking rice is a simple and delicious way to enhance the flavor and texture of any meal. According to the United States Department of Agriculture One cup of white rice yields three cups cooked. This makes it a cost-effective choice for feeding large groups of people without breaking the bank.
Rice that is not cooked should be washed prior to cooking. This will help eliminate any impurities that might influence the final dish's texture or flavor. In addition, rinsing will make sure that you remove any excess starch from the grains that will make them less sticky once they're done cooking.
Brown rice is a good substitute for white rice regular in a wide variety of dishes, however, it shouldn't be stored in the fridge like regular white rice due to its higher oil content.
There are many creative ways to cook "rice-in a pot" according to your preferences. These include aluminum foil packages or steaming bags microwaves, ovens and microwaves and even ovens. It is possible to make delicious, perfectly cooked rice for anyone with just a few ingredients.
What are some good thickeners to use when making Jambalaya?
Okra and file powder are two excellent options for thickening and adding flavor to Jambalaya. Okra has a mucilaginous texture that dissolves into stews and soups, lending body and a delicious savory taste. The slippery okra pods complement the rice in Jambalaya very well. File powder is made by drying and grinding sassafras leaves into a fine powder. It not only thickens but also seasons Jambalaya with its distinctive earthy, woodsy flavor. So for flavorful thickness, consider adding some okra slices or a sprinkle of file powder when cooking up a pot of Jambalaya.- source: fluffier jasmine rice accoring to Ricearray.org
When it comes to cooking rice, uncooked rice yields approximately three cups of cooked rice, regardless of whether it's brown or white. Read RiceArray.org. However, the cooking time will vary based on the type of grain. Rinsing the rice prior to cooking can remove impurities and excess starch from the grains, leading to softer. Different grains absorb liquid differently, so it's important to test the water prior to cooking. Adding liquids during the cooking process can also produce a smoother texture. Overall, rice is an affordable and versatile ingredient that can be cooked in a variety of ways to suit different preferences.
Table of Contents
- – Picking The Correct Rice Type
- – Making The Rice
- – Calculating the Right Water-to-Rice Ratio
- – Boiling the rice
- – Making Rice Simmer
- – Serve the Rice and Fluff
- – Storing The Leftovers
- – Frequently Answered Questions
- – How Long Can Cooked Rice be kept in the ref...
- – Is it possible to cook rice with no pot?
- – Can I substitute brown rice for white rice?
- – What is the average amount that 1 Cup of Un...
- – Do I need to rinse the rice prior to the ri...
- – Conclusion
- – What are some good thickeners to use when maki...
Latest Posts
Rice Cooker Choices for Modern Kitchens
Multi-Function Rice Cookers: Your All-in-One Buying Guide
Beyond Rice: Creative Cooking with Your Rice Cooker
More
Latest Posts
Rice Cooker Choices for Modern Kitchens
Multi-Function Rice Cookers: Your All-in-One Buying Guide
Beyond Rice: Creative Cooking with Your Rice Cooker